Jeez, talk about leaving something in the back burner. It's only now that someone reminds me I haven't concluded a series of project posts from way back in 2020, so maybe there wasn't much interest? Oh well, here we go!
So last time we left off, we got the tsuka (hilt) built, wrapped in same (rayskin), and epoxied to repair the mangling I did. So now we're going to wrap things up by...wrapping it up (tsukamaki).
BEHOLD! The most Home-brewed tsukamaki rig known to man!
I'm
not going to go into the gruesome details of tsukamaki - you should be
able to find tons of tutorials and YouTube vids out on the internets.
A
couple of things worth mentioning, though. Firstly,if you are using leather tsukamaki, then not all clamp designs work because the surface of leather is smooth. Choose poorly and the clips slip
right off, costing you several twists worth of progress and forcing a
restart. I found spring clamps work better
for leather, but they are still not entirely slip-proof. Do not proceed
until you are sure the clamp is stable, and even then, be alert for the
slightest creeping of the clamp which usually precludes the dreaded SNAP
(i.e. zanshin!!).
Secondly, choose a suitable material for those
little paper hishigami you will insert into the tsukaito. It is said
that they contain prayers written on them and incorporated into the
sword to protect the warrior. As the sword is considered to have a
soul, every part must suitably embody it. For me, the only material
that is able to merge my spirit with my sword's...
...is a box that once contained the sacred Relakkuma cookie sticks.
Okay
seriously, no matter what you've heard about them, hishigami are just
there to reinforce the tsukamaki twists. They are typically made of
folded washi paper, but for leather tsukaito you need a stronger
material like card paper.That, and I'm just too lazy to fold washi.
Placing
the hishigami can be challenging, so if those damn things keep trolling
you by popping out, yank 'em and chuck them across the room.
Here
lies the completed tsuka. I opted for a beefier tsuka, not just for
strength but also for balance as the blade is still pretty long compared
to the nakago.
You can also see the bulge from when I had to
repair and reinforce the tsukaito where it snapped during the pre-stretching. Good thing I can not only live with it since the whole thing looks amateur anyway, but also a test grip suggests that it helps keep the tsuka from slipping out of my hands.
The
tsukamaki twists may start out all wobbly, but they will eventually
settle down and flatten a bit. It doesn't hurt to give the iaito a few
practice swings once it's complete.
Before
you put your newly-minted wakizashi iaito together, one thing you might
want to do is shim the tsuba so it doesn't rattle. It is highly
unlikely that the tsuba will precisely fit the nakago you've shaped.
If it rattles what do you use to shim the tsuba? That's right kids!! EPOXY!!! I
swear this iaito will be 90% epoxy. Well, maybe not epoxy it if it's antique and/or comes with an NBTHK paper.
If the slot in the tsuba (nakago-hitsu/ana) is too small, you can file it to fit, but before you do, think twice if your tsuba has historical value.
Now you can put everything together. This completes the sword.
On to the saya.
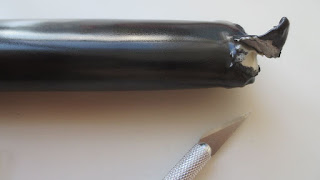
Once
you're sure the final coat is completely dry, carefully remove any tape
you had on the saya fittings. Use an Xacto knife to cut the lacquer
around the tape so you don't accidentally rip a chunk out like a bad
hangnail.
Remember, it's better to cut off too little and trim it down, than to cut too much and wreck your finish.
You're at the home stretch, just some finishing touches such as the shitodome (those metal thingies protecting the hole on the kurikata. They can be cheaply obtained from eBay and they should be fine for these small things. Shtiodome are not mandatory, so if you opt out of installing them, just make sure the edges of the kurikata hole is smoothed out so they don't chew up your sageo.
Once the shitodome are glued on, install the sageo.
And that's all there is to making iaito fittings! Easy peasy, nothing to it!
Now wear your newly-formed daisho with pride!
Just be discreet about where you wear them as I assume no responsibility if you make the news. Or YouTube.
·


No comments:
Post a Comment